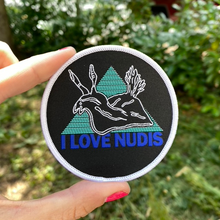
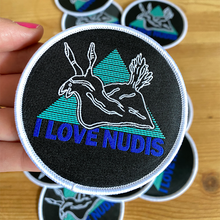
I love Nudibranchs and I bet you do too! This is the original I LOVE NUDIS™ Logo from 2019 featuring one of my favorite Nudibranch species - Nembrotha - with a vivid turquoise background and bold blue I LOVE NUDIS below. Inspired by 1980s SCUBA shirts from an era of adventurous diving and exploration.
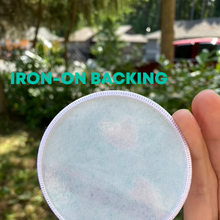
Durable iron-on patches perfect for your BC, shirts, hats, backpacks, and more.
Size: 3in x 3in (7.62cm x 7.62cm)
To Apply Patches:
- Prepare Your Surface and Iron - make sure your iron is hot and the steam settings are off. Protect your garment or headwear with a cotton cloth or parchment paper before you start.
- Perfectly Position the Patch - Once you decide on a placement, ensure it is in the correct angle and position because once you adhere the patch, you won't be able to adjust it. If applying the patch on shoes or hats, stuff them with towels to prevent shifting. This makes pressing easier and more effective as you can get closer to the material.
- Prepare the Area - With your patch firmly in place, it's time to make sure the fabric is smooth and ready for adhesion. Begin by taking off the patch and carefully pressing a hot iron over its former position - don't forget to drape cloth or an old towel over top of both fabrics so as not to damage either! After about half a minute with some heat applied, replace your chosen decoration where desired. To enjoy even greater security from shifting or falling patches, take advantage of sewing around their edges too!
- Apply the Patch - Make sure to place the patch in the right spot and cover it with parchment paper or a cotton cloth. Press down firmly on all its edges as you iron it. Take your time and ensure the patch is firmly attached to your fabric. Once ironed on, let it cool. Your patch should now be firmly applied but if not, just repeat the process on the area that need a little extra attention.
NOTE: Some fabrics are better suited for iron-on patches than others. Cotton and polyester work well, but nylons may be damaged by high heat during the application process while vinyl won't stick at all! Make sure you know what type of material your garment is made from before deciding to apply your patch! There are a few ways to apply patches on leather. One way is by sewing them onto the surface, but you can also use an iron with this method and get similar results without damaging your favorite material!

Since we both love Nudibranchs and their ocean home, my orders are shipped to you using plastic-free, recycle-able materials from Edmonds, WA. Please reuse the materials you get or recycle them! Thank you :)


